Solution Beast Total Technical Solutions

How to Lock/Encrypt Pen Drive with Password on Windows
USB thumb drives are small, portable, and can be read on any device with a USB port. These features make them perfect vehicles for transporting data between computers and other devices . Due to their portability, however, they are also easily lost. Thus sensitive files carried on a USB stick should always be protected. Here are many ways to Lock /Encrypt Pen Drive with Password on Windows
1. BitLocker Encryption on Windows

Windows can encrypt entire operating system drives and removable devices with its built-in BitLocker encryption. When TrueCrypt controversially closed up shop, they recommended their users transition away from TrueCrypt to BitLocker. BitLocker Drive Encryption and BitLocker To Go require a Professional or Enterprise edition of Windows 8, or 8.1 or 10, or the Ultimate version of Windows 7 that works similarly.
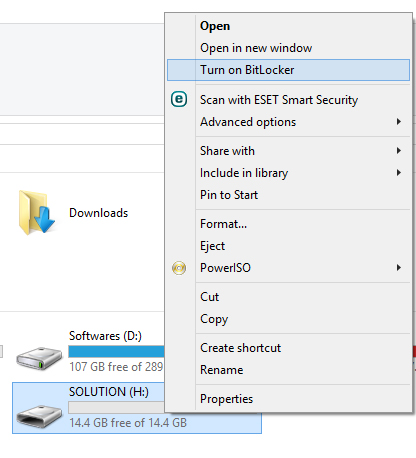
To enable BitLocker, open the Control Panel and navigate to System and Security > BitLocker Drive Encryption. You can also open Windows Explorer or File Explorer, right-click a drive, and select Turn On BitLocker. If you don’t see this option, you don’t have the right edition of Windows.
Click the Turn on BitLocker option next to an operating system drive, internal drive (“fixed data drive”), or removable drive to enable BitLocker for the drive.
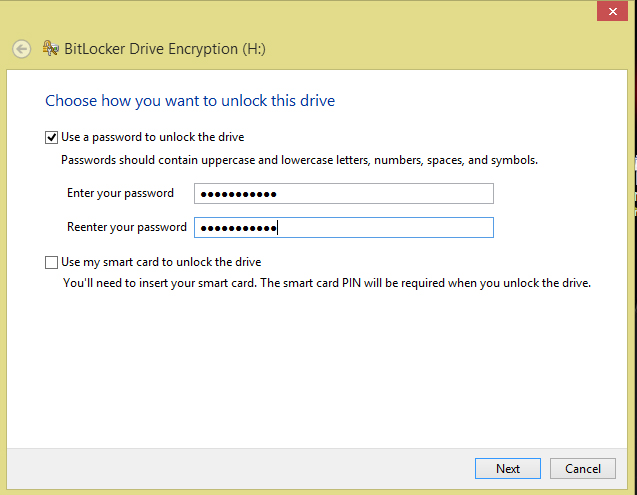
- BitLocker Drive Encryption: Sometimes referred to just as BitLocker, this is a “full-disk encryption” feature that will encrypt an entire drive. When the computer boots, the Windows boot loader loads fromthe System Reserved partition and the boot loader will prompt you for your unlock method – for example, a password. BitLocker will then decrypt the drive and load Windows. The encryption is otherwise transparent your files will appear like they normally would on an unencrypted system, but they’re stored on the disk in an encrypted form. You can also encrypt other drives in a computer, not just the operating system drive.
Back Up Your Recovery Key
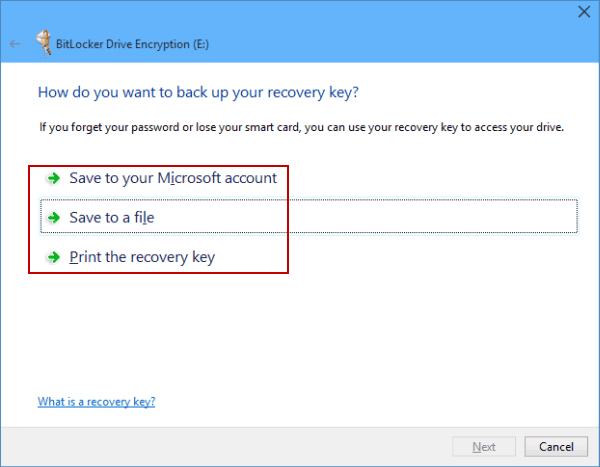
BitLocker will provide you with a recovery key. This key can be used to access your encrypted files if you ever lose your main key for example, if you forget your password or if the computer with the TPM dies and you have to remove the drive.
You can save the key to a file, print it, store it on a USB flash drive, or save it to your Microsoft account on Windows 8 and 8.1. If you back up the recovery key to your Microsoft account, you can access the key later at https://onedrive.live.com/recoverykey . Be sure to keep this key safe if someone gains access to your key, they could decrypt your drive and bypass the encryption. You may want to back it up in multiple locations – if you lose this recovery key and your main unlock method, your encrypted files will be lost forever.
2. Create An Encrypted & Password Protected With Rohos Mini Drive

Many tools can encrypt and password protect your data. Most, however, require Administrator rights to run on any given computer. Unfortunately, this is also the case for one of the best encryption tools: TrueCrypt. Tools like these are not a viable solution if you need to securely transfer data to a computer where you do not have Administrator rights.
Rohos Mini Drive, on the other hand, is a tool that will work whether or not you possess Administrator rights. The free edition can create a hidden, encrypted, and password protected partition of up to 2GB on your USB flash drive.
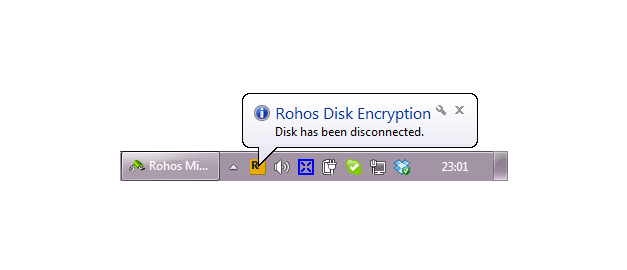
Once you have created a password protected and encrypted container on your external drive, you can open it by clicking the Rohos Mini.exe icon from the root folder. After entering the password, your Rohos disk will be mounted and accessible via your Computer, i.e. the directory of all drives and partitions connected to your system. To close your Rohos partition, right-click the Rohos icon in the Windows taskbar notification area and select Disconnect.
3. Lock Your Flash Drive with USB Safeguard
USB Safeguard is a portable app that runs directly from your flash drive and thus does not require Administrator rights on the local computer. It uses on-the-fly AES 256 bit encryption. The free version is limited to drive size of 2GB.
Download the usbsafeguard.exe and copy it to your USB flash drive. Run it from your flash drive and enter a password to lock the drive. To unlock it, run the file again and enter the password. The locking procedure must be repeated every time you want the drive to be locked as the tool will remember its last status, i.e. locked or unlocked. This also means that you can change the password every time you use USB Safeguard.
4. GiliSoft USB Stick Encryption
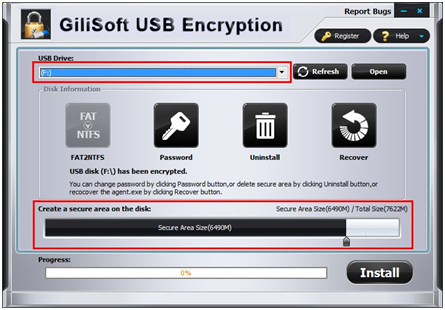
USB flash drive is a small and portable device. It can be read and written on any device with a USB port. So we usually use USB to copy, write, or transport data among computers. However, USB flash drive is easily lost since it’s so small and portable. Thus we should pay attention on protecting sensitive files and data carried on a USB stick.
GiliSoft USB Stick Encryption is able to help you password protect files, folders, and data on your USB stick and computer.
Below is a step-by-step tutorial on how to password protect your USB/Flash pen drive, just follow it, you will find that encrypting USB drive is pretty easy!
Step 1
Run Gilisoft USB Encryption, and insert the USB flash drive that you want to password protect into the USB port of your computer.
Step 2
Choose the drive and set the size of secure area will be created. You can refer to the picture below:
Step 3
Click on the “Install” button to start creating secure area.
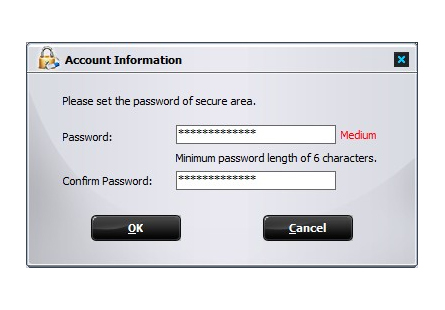
Step 4
Set the user name and password of the secure area and click on the “OK” button to finish the operation.
5. USBSecurity

Run “USBSecurity.exe “, and then select the drive disk you want to password protect.
Step 2: Set password to protect your drive

Open your disk and run “USBSecurity.exe”, enter your password in the pop-up window and then confirm it.
Next, you can set a “password hint” for your password to help you to retrieve your password when you forget it the next time.
When finished the above operation, you can click on “Protect” button to finish password protection.
source – howtogeek